Coupons
The Coupons screen needs WCPOS Pro. Applying a coupon your store already has works on the free plugin too: see Applying Coupons.
The Coupons screen is your store's list of WooCommerce coupons, inside the POS. Use it to look a coupon up, make a new one for a promotion, change an amount or an expiry date, or take an old coupon away. Every change goes to your store, so the coupon is the same in WP Admin › Marketing › Coupons and on your website, and your other tills get it when they sync.
Open it from the Coupons icon in the menu on the left. On a phone, open the menu first.
On the free plugin: what the screen looks like
On the free plugin the screen opens as a blurred view of the list, with a card on top. Nothing on it can be changed. You can still make coupons in WP Admin › Marketing › Coupons, and apply them in the cart. See What Pro looks like on the free plugin.
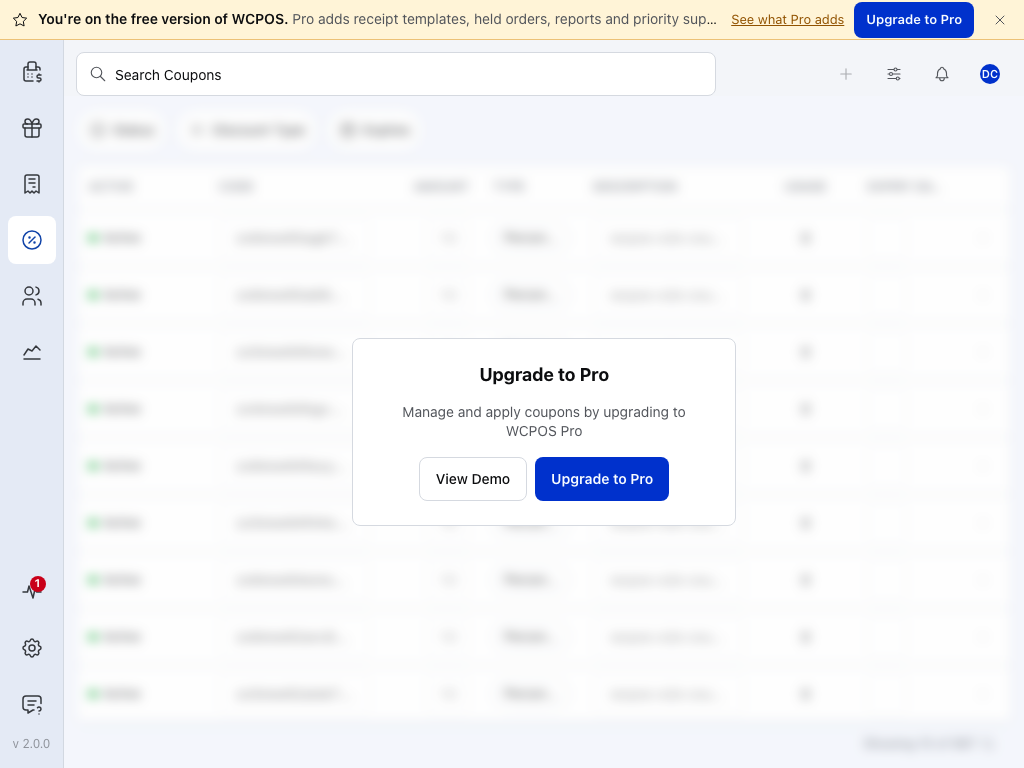
- Coupons — the screen in the menu.
- Upgrade to Pro — the card says Manage and apply coupons by upgrading to WCPOS Pro. Applying a coupon in the cart is free all the same.
- View Demo — opens the Coupons screen on the WCPOS demo store.
- Upgrade to Pro — opens the WCPOS Pro page on wcpos.com.
The coupon list
Newest coupons are at the top. Scroll down to load more.
A change you make in the list goes to your store as you make it. There's no Save button: to undo a change, change it back.
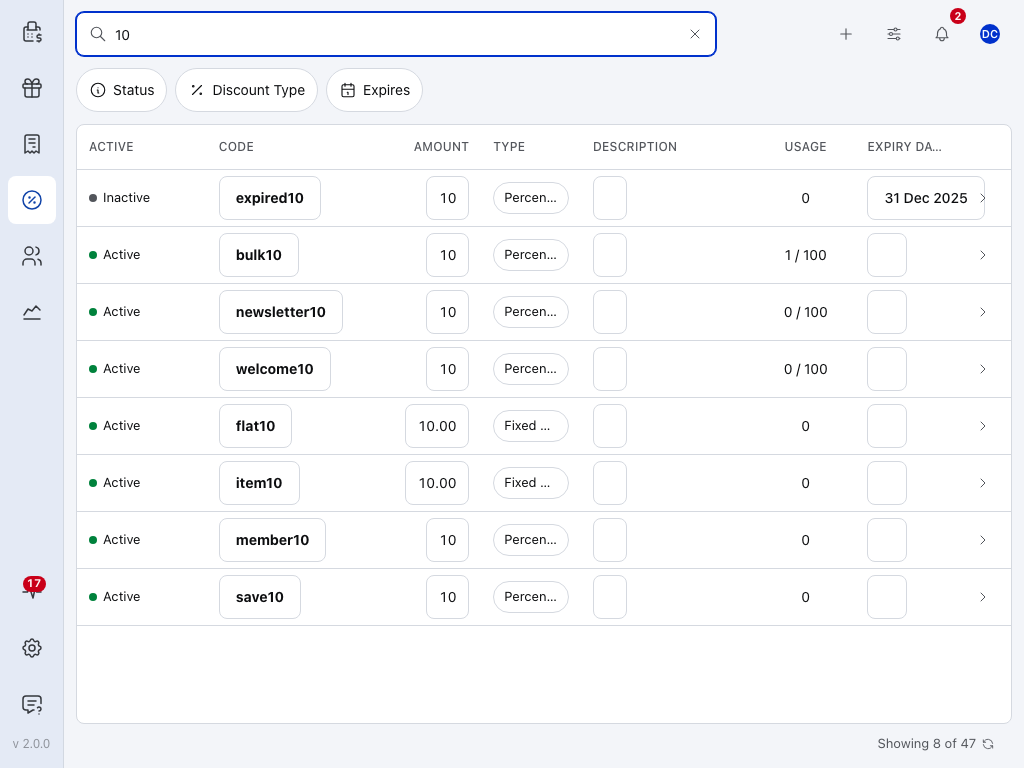
- Search Coupons — type part of a code or a description.
- + — make a coupon.
- Display options — choose which columns show. Status, Date created and Date modified are hidden at first.
- Status — Published, Draft, Pending or Trash. The list holds your store's published coupons; a coupon you set to Draft or Pending on this device shows here until the till next fetches coupons.
- Discount Type — show only one type of coupon.
- Expires — show only coupons that expire between two dates you pick.
- Active — green Active when the coupon is published and hasn't expired; Inactive otherwise. It's a label, not a switch. Usage limits and spend rules can still stop an Active coupon: see When the till refuses a coupon.
- Code — what the customer gives you. Tap it to change it.
- > — opens the coupon to change it.
- Showing 8 of 47 — how many coupons are in the list out of all your store's coupons. Press the arrow beside it to fetch the latest from your store.
The other columns, close up, on the first two coupons above:
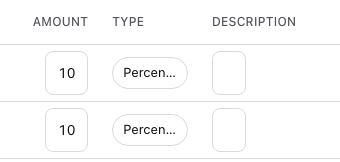
- Amount — tap it to change the amount on a keypad.
- Type — tap it to filter the list to that type.
- Description — the coupon's internal note. Tap the box to change it.
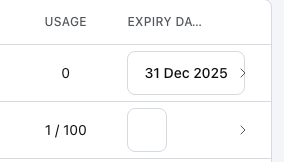
- Usage — how many times the coupon has been used, then its limit: 1 / 100 is one use of a hundred. With no limit you see the count alone, like the 0 above it. A one-time coupon nobody has used yet shows 0 / 1.
- Expiry Date — tap it to pick a new date. 31 Dec 2025 has passed, so that coupon shows Inactive.
Filter the list
Press a filter and choose from its list. The filter then shows what you chose, with a ✕ to take it off. With two or more filters on, Clear all takes them all off.
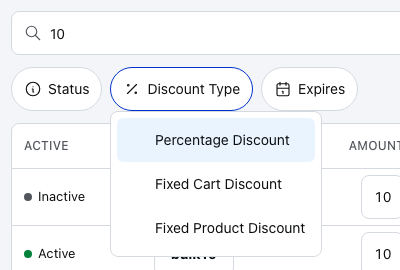
- Discount Type — the filter, open.
- Percentage Discount — a percentage off the items.
- Fixed Cart Discount — an amount off the whole order.
- Fixed Product Discount — an amount off each matching item.
When nothing matches, the list says No coupons match these filters, with Clear filters below it.
Make a coupon
- Press + at the top of the Coupons screen.
- Type a code, or press Generate.
- Choose the discount and type the amount.
- Choose when it expires.
- Leave Status at Select status to use the coupon straight away: it saves as Active, which the list's Status filter calls Published. Choose Draft or Pending to hold it back.
- Add any limits you need, then press Add Coupon.
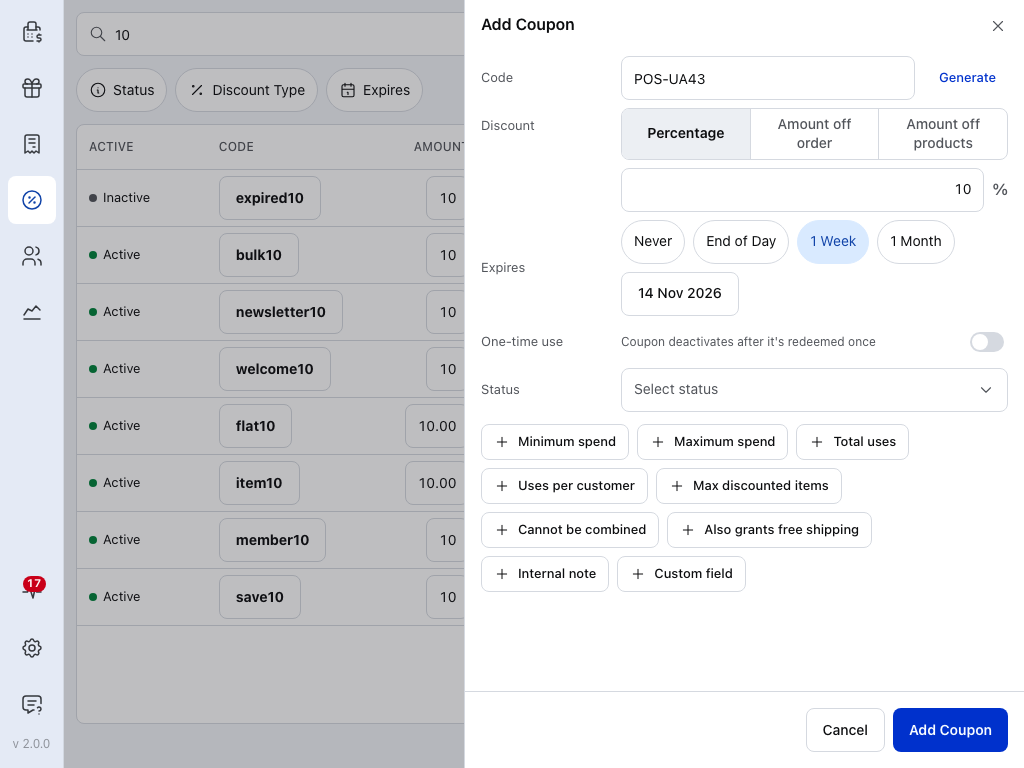
- Code — what the customer gives you at the till. Capitals don't matter there.
- Generate — makes a code such as POS-UA43, without letters that are easy to misread (0 and O, 1, I and L).
- Discount — Percentage, Amount off order or Amount off products. See the types.
- Amount — the percentage, or the amount in your store's currency.
- Expires — Never, End of Day, 1 Week, 1 Month or Pick a Date. End of Day, 1 Week and 1 Month run to the end of that day in your store's time zone, and the date shows below.
- One-time use — the coupon stops working after it's used once.
- Minimum spend and the other buttons — add a limit or a setting to the coupon. See What each setting does.
- Add Coupon — saves the coupon to your store. Cancel closes without saving.
The new coupon is in the list, and in the cart's coupon list, straight away.
To make a coupon during a sale and put it on the order at once, use New coupon in the cart: see Discounts.
Coupon types
The POS and WooCommerce name the three types differently:
- Percentage (WooCommerce: Percentage discount) — a percentage off the items in the cart.
10takes 10% off. - Amount off order (WooCommerce: Fixed cart discount) — an amount off the whole order.
5.00takes $5 off the order. - Amount off products (WooCommerce: Fixed product discount) — an amount off each matching item.
2.00takes $2 off each T-shirt.
What each setting does
The form always shows Status. Each button under it adds one more setting: the spend and use limits, Internal note and the rest. Each added setting gets a Remove button that takes it off again. Open the list below for what each one does.
Coupon settings and limits
| Setting | What it does |
|---|---|
| Status | Active, Draft or Pending. Active is Published in WooCommerce and in the list's Status column. A Draft or Pending coupon shows Inactive, and leaves the list the next time the till fetches coupons. A new coupon is Active unless you choose otherwise. |
| Minimum spend | The order must reach this amount before the coupon applies. |
| Maximum spend | The coupon doesn't apply above this amount. |
| Total uses | How many times the coupon can be used, by everyone together. Not offered while One-time use is on. |
| Uses per customer | How many times one customer can use it. |
| Max discounted items | How many items the coupon takes money off. Only for Percentage and Amount off products. |
| Cannot be combined | The till refuses this coupon if the order already has another coupon. |
| Also grants free shipping | Free shipping methods that need a coupon become available on the order. |
| Internal note | The coupon's description in WooCommerce. The cart's coupon list shows it under the code, and a receipt printed from your store shows it in place of the code, so customers can see it. Don't put anything private in it. |
| Custom field | A key and value of your own, stored on the coupon. |
Some WooCommerce settings aren't in the POS form: Products and Exclude products, Product categories and Exclude categories, Exclude sale items and Allowed emails (which takes a * wildcard, such as *@yourcompany.com for staff only). Set them in WP Admin › Marketing › Coupons. They still apply at the till; see When the till refuses a coupon. Exclude sale items also skips an item whose price you lowered at the till: see How POS Price Changes Interact with Coupons, and for developers the POS Discount Reference.
Change a coupon
Each change goes to your store as you make it. Close doesn't undo anything: to go back, change the field again.
Press > at the end of the coupon's row. On a phone, tap the coupon.
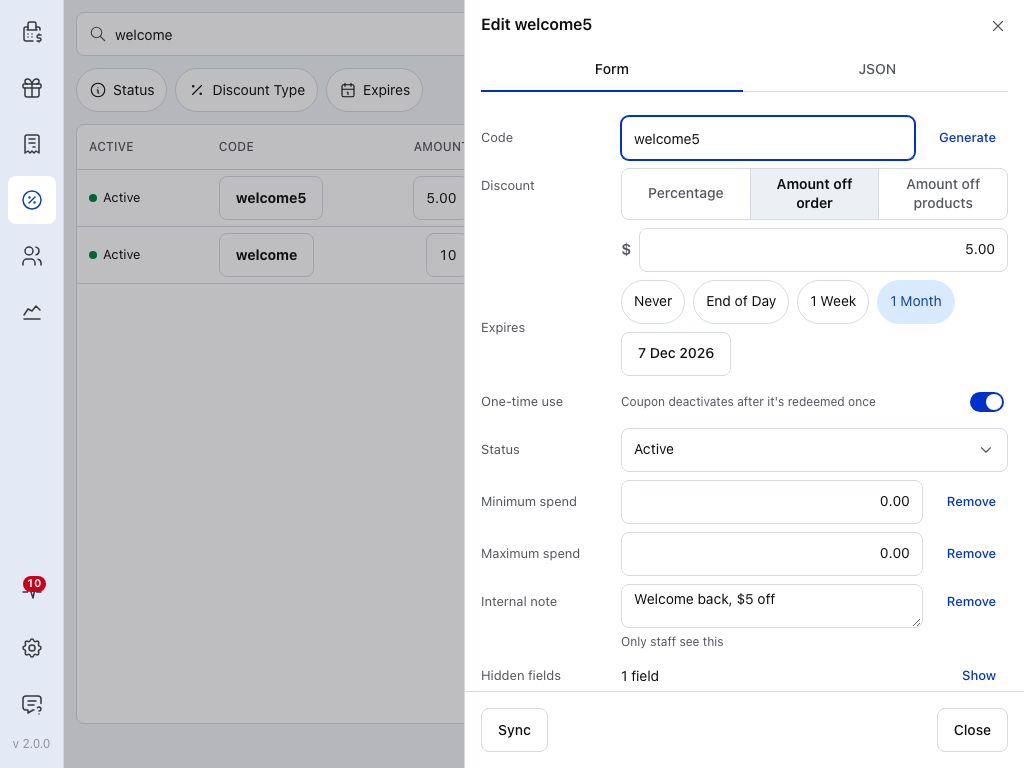
- Code — change it here, or press Generate for a new one.
- Generate — makes a new code. The old code stops working.
- Discount — the type.
- Amount — the amount.
- Expires — the date it stops working.
- One-time use — on here, so Usage in the list shows 0 / 1.
- Status — Active, Draft or Pending. Active is what the list's Status filter calls Published.
- Remove — takes a setting off the coupon. A coupon saved in WP Admin often shows Minimum spend and Maximum spend at 0.00, which sets no limit.
- Show — fields that plugins add. See Hidden fields and the JSON tab below.
- Sync — fetches this coupon again from your store, for a change made in WP Admin since.
- Close — closes the dialog.
Hidden fields and the JSON tab
Show opens the coupon's hidden custom fields. Plugins use them to store their own settings, so change them only if a plugin's instructions tell you to.
The JSON tab at the top of the dialog shows the coupon as your store sends it.
If Sync can't reach your store, a message says Couldn't refresh. The copy on this device is unchanged — check your connection and try again.
Delete a coupon
Delete is at the bottom of the coupon's dialog, for staff allowed to delete coupons.
- Open the coupon and press Delete.
- Tick Confirm, then press Delete.
The dialog warns: Deleted coupons will be placed in the Trash on the server. The coupon goes to the Trash in WooCommerce and can't be used. To bring it back, open WP Admin › Marketing › Coupons, choose Trash and restore it. To stop a coupon working without deleting it, give it an expiry date instead: after that day the till refuses it.
Who can make and change coupons
Making, changing and deleting coupons each need their own permission, set in WP Admin › POS › Settings › Access:
- Create & edit coupons — a Cashier has it by default. Without it, + is greyed out and the list can't be changed.
- Delete coupons — a Cashier doesn't have it by default. Without it, the coupon's dialog has no Delete.
Hover the greyed-out + to see why. See Accessing the POS to change a role.
Use a coupon on a sale
In the cart, press + and choose Add Discount, then switch to Coupon, pick the coupon and press Apply. This works on the free plugin too. See Applying Coupons.
If something goes wrong
A coupon made in WP Admin isn't in the list. Press the arrow beside Showing … of … at the bottom of the list to fetch the latest. Hold it down for Clear and Refresh, which empties this device's copy of the list and fetches it all again.
+ is greyed out. On the free plugin it says Upgrade to Pro. Otherwise your role can't create coupons: see Who can make and change coupons.
A change flips back. Your store refused it. The POS puts the store's value back and logs Reverted a change your store rejected. A new coupon your store refuses, such as a code that already exists, is listed in Store health.
A coupon says Inactive. It has expired, or its status isn't Active. Open it and change Expires or Status.
The till refuses a coupon. See When the till refuses a coupon.