Custom Fields
For a message for this sale only, such as an engraving, go straight to Add a field to a line. To copy fields already saved on products, follow Choose the keys.
Some products carry extra fields besides their name and price: an engraving message, a supplier code, or a field another plugin adds. WooCommerce calls these meta data, and the settings sheet lists the ones to copy under Meta Data Keys. Each field has a key, its name (such as engraving), and a value (such as Happy Birthday).
A product's extra fields stay behind when you add it to the cart, unless you name their keys in Meta Data Keys. A named field is copied onto the cart line and saved with that line of the order.
A custom field on the whole order is added with + Custom field in Order details, and one on a customer's account with Custom field in the customer form.
When to copy keys
- A plugin's product data: a bottle deposit plugin stores
_bottle_depositon each product. Add that key and the deposit is saved with the line on the order. It starts with_, so it stays out of sight on the line: see Fields that start with _. - Your own product fields: an engraving message or a supplier code, carried through to the order.
- Data for other plugins: a plugin that reads order line items finds the value there.
- Batch, lot or tracking codes: kept with what was sold.
Choose the keys
Use the exact key the product already stores; if you don't know it, ask whoever set up the field. Choosing a key here only says what to copy. It doesn't add the field to any product. The keys are kept on this device for this store, so set them on every till that sells these products. The same keys apply in the grid and the table view.
Engraving and engraving are two different keys. Type the key exactly as the product stores it.
- In the Product Panel, press Settings, the last button on the search bar, and scroll down to Meta Data Keys.
- Open Meta Data Keys and pick a key from the list. If it isn't there, type it and choose Add "…" as a custom key.
- Pick more keys the same way, then press Close.
- Add a product that has the field to the cart, and check the new line for its key and value. For products with options and keys that start with
_, see What gets copied.
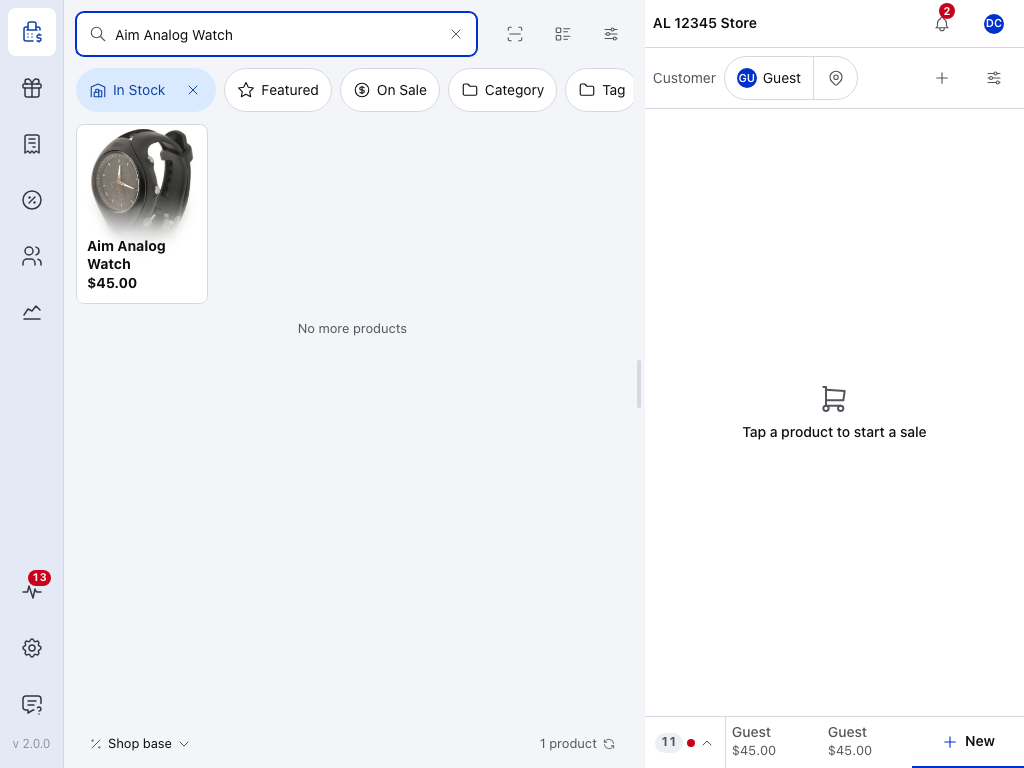
- Settings — the last button on the search bar. It opens the panel's settings, with Meta Data Keys near the foot.
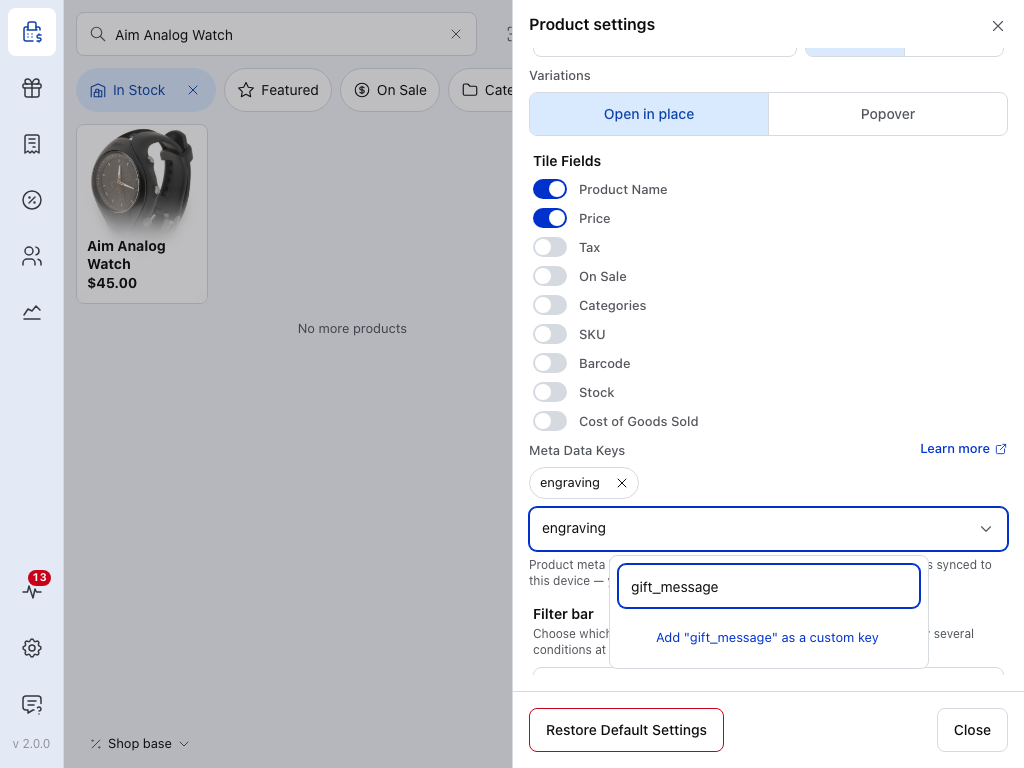
- A chosen key — this field is copied from every product that has it. Press the cross to stop copying it.
- Meta Data Keys — opens the list of keys found on the products on this device.
- Search — type a key. If it isn't on the list, choose Add "…" as a custom key under it. Use that for a key that only appears on products this device hasn't downloaded yet.
- Close — keeps your keys and shuts the sheet.
Restore Default Settings at the foot of the sheet clears them along with your other panel settings.
What gets copied
- Only the keys you chose. Every other field on the product stays behind.
- Only lines added from now on. A line already in a cart keeps what it had. Remove it and add the product again to pick up a new key.
- A variation's own fields. For a product with options, the field is copied from the option you picked, not from the main product.
- Where it shows. A copied field shows under the product's name on the cart line, as
key: value, and is saved with that line of the order. A key that starts with_is copied too, but stays out of sight: see Fields that start with _.
To see these fields in the product list before you add a product, switch to the table view, open Settings, and turn on Meta Data under Product Name.
Add a field to a line
A cashier can add a field to one line by hand, such as the message to engrave on this watch.
- Tap the line's total, or swipe the line, then tap Edit.
- Press Custom field. Type the key in the first box and the value in the second. The line's fields are listed under Custom fields.
- Changes save as you type. Press Close when you're done, then tap the line's total again to slide Edit and Remove away.
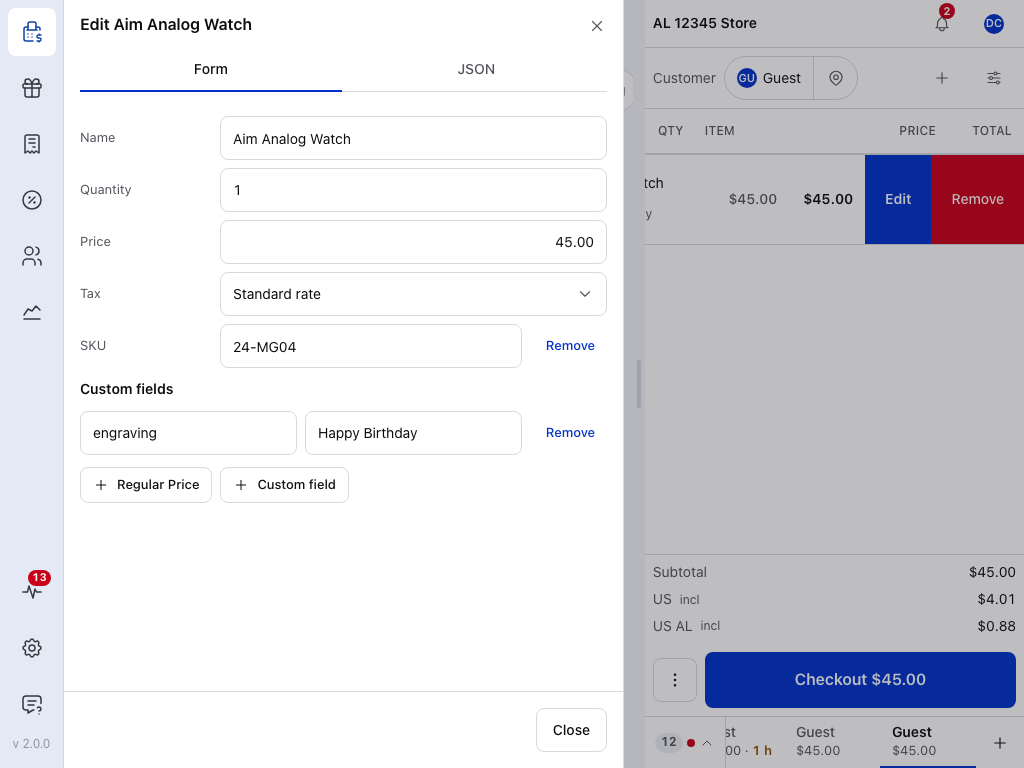
- Custom fields — the line's fields, one key and value each. Fields copied by Meta Data Keys are listed here too.
- A field — its key in the first box, its value in the second. Change either in place. Each change is saved as you make it.
- Remove — takes the field off the line.
- Custom field — adds another empty field. Regular Price beside it adds another detail to the line: see Line Items.
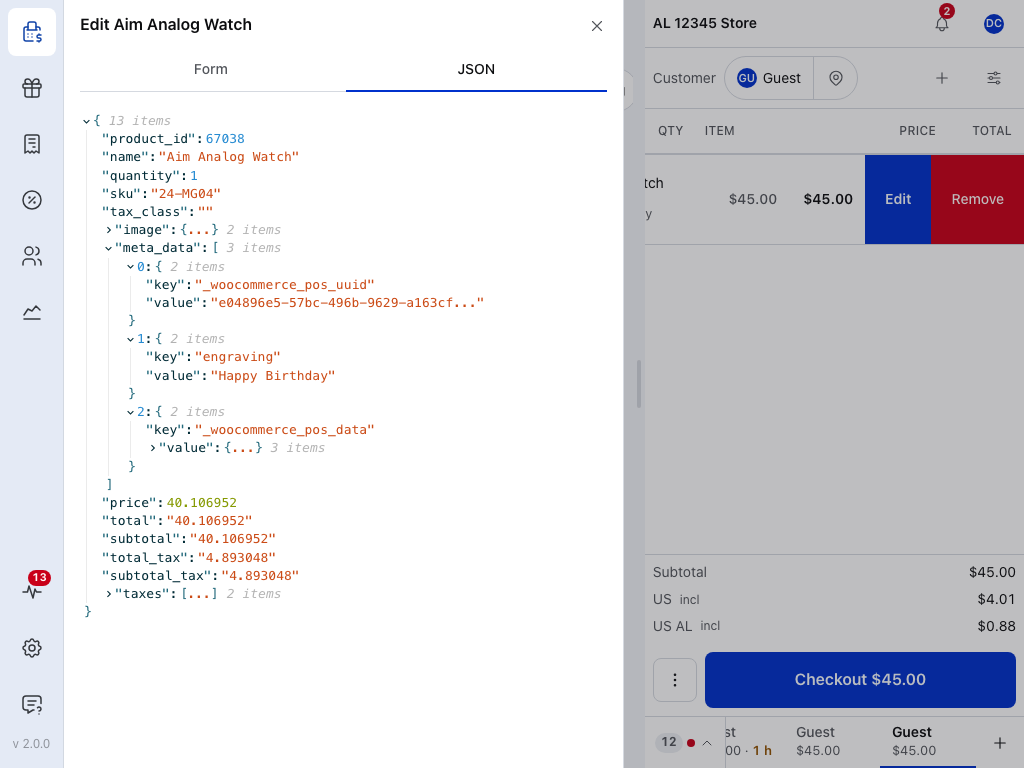
- JSON — every field on the line, including the ones that start with
_. See Fields that start with _.
The cart then shows the field under the product's name, as key: value, and it is saved with this line of the order.
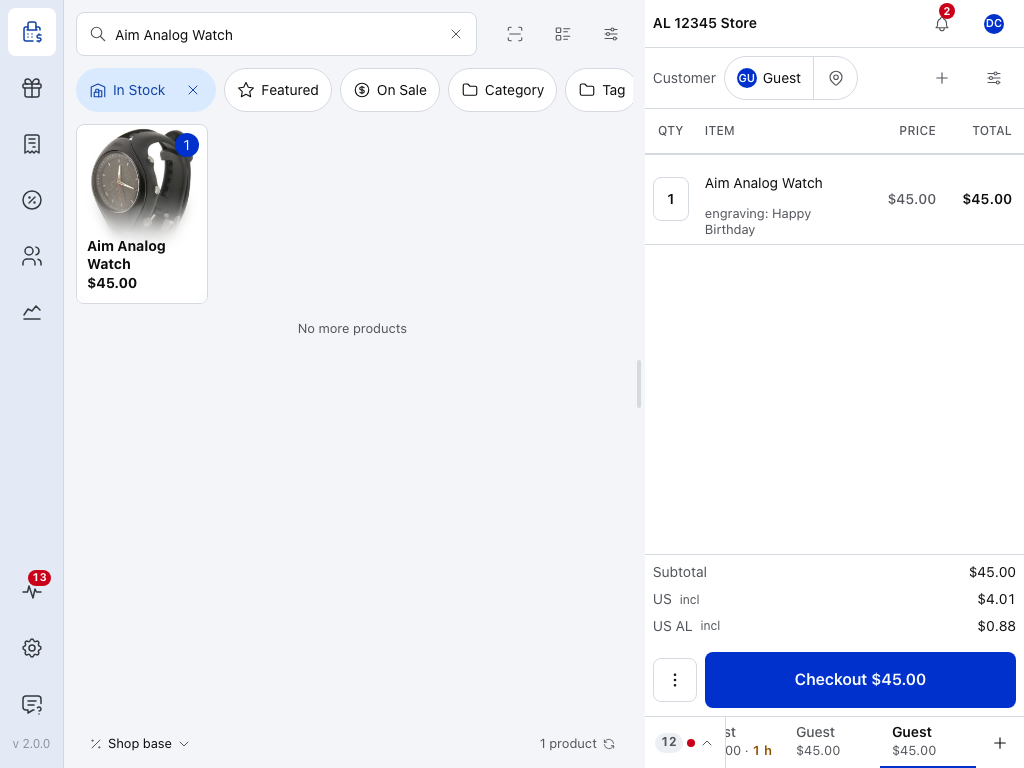
- The field —
engraving: Happy Birthday, under the product's name, as the key, a colon and the value.
Fields that start with _
Fields whose keys start with _ are saved with the order, but hidden from the cart line, the Form tab of its Edit sheet, and receipts.
See private fields, or fix a refused key
These private fields are kept by WCPOS or another plugin. For example, _woocommerce_pos_data is where WCPOS keeps the line's price and tax status.
A private key that is already on the line, such as _woocommerce_pos_data, can't be used for a new field. Paste it into a field's key and the POS refuses it: the key stays empty, and a note at the top of the sheet says This key is managed by WCPOS. Choose another key.
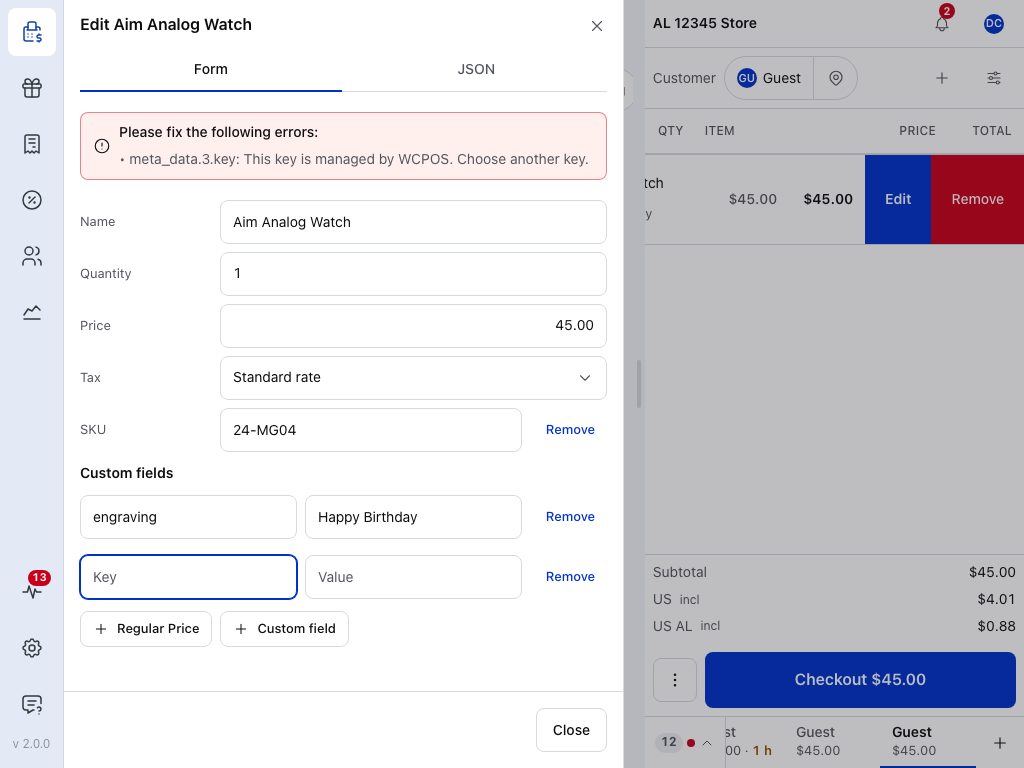
- The refused field — its key stays empty. Give it a key of your own that doesn't start with
_, so the field stays on the line where you can see it. - Remove — takes the unfinished field away again.
To see every field on the line, private ones included, open the JSON tab at the top of the line's sheet:
Other sheets, such as the order's details, fold their private fields into one Hidden fields row, with a count. Press Show to see and change them, and Hide to put them away.
If something goes wrong
- The field isn't on the line — check the key's spelling and capitals in Meta Data Keys, and check that this product, or this option, has the field. A line added before you chose the key doesn't get it: remove the line and add the product again. On another till, set the key there too.
- The key you want isn't suggested — the list only knows the products on this device. Type the key and choose Add "…" as a custom key.
- This key is managed by WCPOS. Choose another key. — that key is already a private field on this line. Give your field another key.
- The field is on the order but not under the line — its key starts with
_. Tap the line's total, tap Edit, then open the JSON tab to see it.