Make a Sale
A customer walks up with something to buy. This page walks through one cash sale, from the first product to the next customer.
With Open and close the register switched on, the till won't record a payment while the register is closed, and a card you've already taken would have to be refunded. See Registers for the setting, and Stores, Registers and Devices for how it works.
Build the cart
Tap a product and it lands in the cart. Tap it again for one more. Products and cart sit side by side; on a phone, they're on separate tabs.
Each sale starts with your store's default customer. That's whoever Default POS Customer names, or the cashier when Use Cashier Account is on.
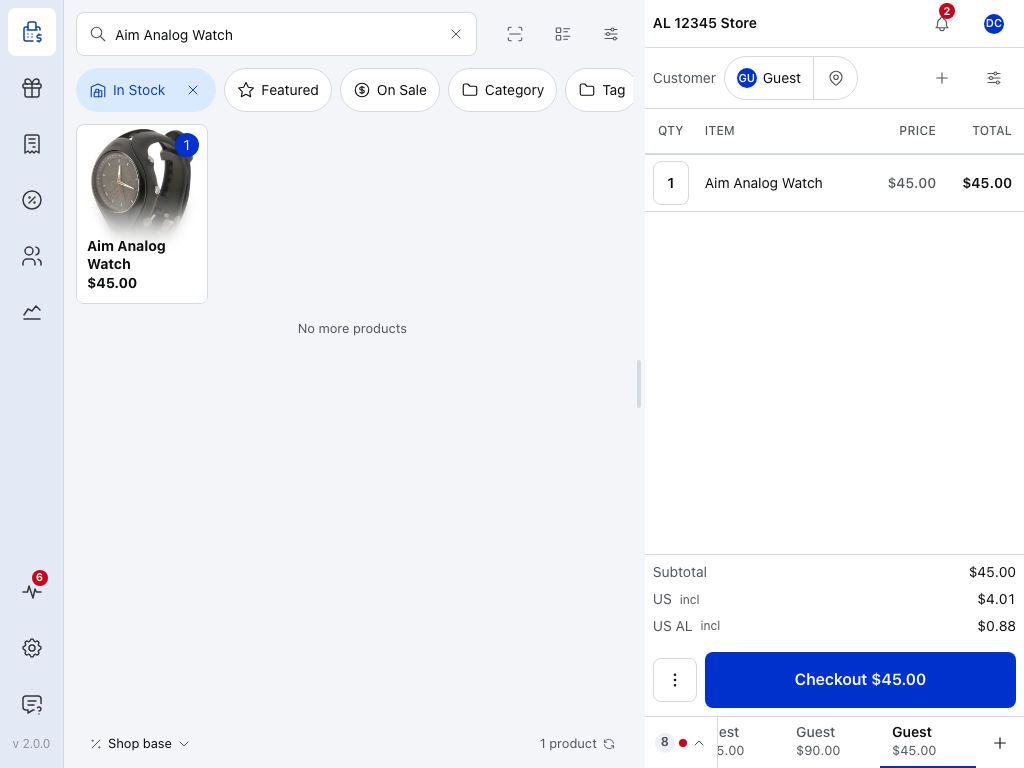
- Register bar — the register you're on and its session. See Stores, Registers and Devices.
- Search — type a name or SKU, or scan a barcode. See Search and Filtering.
- Products — tap one to add it. A product with options asks which one; see Variations.
- Open orders — every sale in progress on this register. Tap one to switch to it. See Open Orders.
- Customer — who the sale is for. Tap to choose someone else. See The Cart.
- Quantity — tap it, type the new number and press Done. See Line Items.
- Add menu — a new customer, a product that isn't in your catalogue, a fee or a discount. See Discounts.
- Subtotal — the order's figures before you take payment.
- Checkout — names the total. Press it when the cart is right.
Take the payment
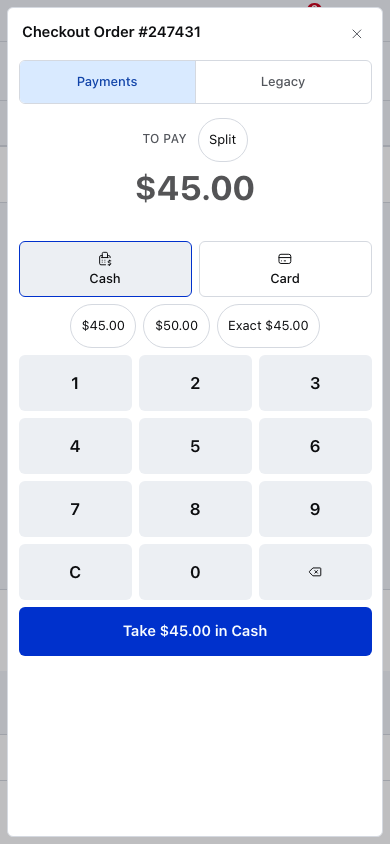
Press Checkout. The Tender screen opens beside the order, with the amount due as the big figure and the first payment method picked. On a phone it fills the screen under the title Checkout Order # and the order number.
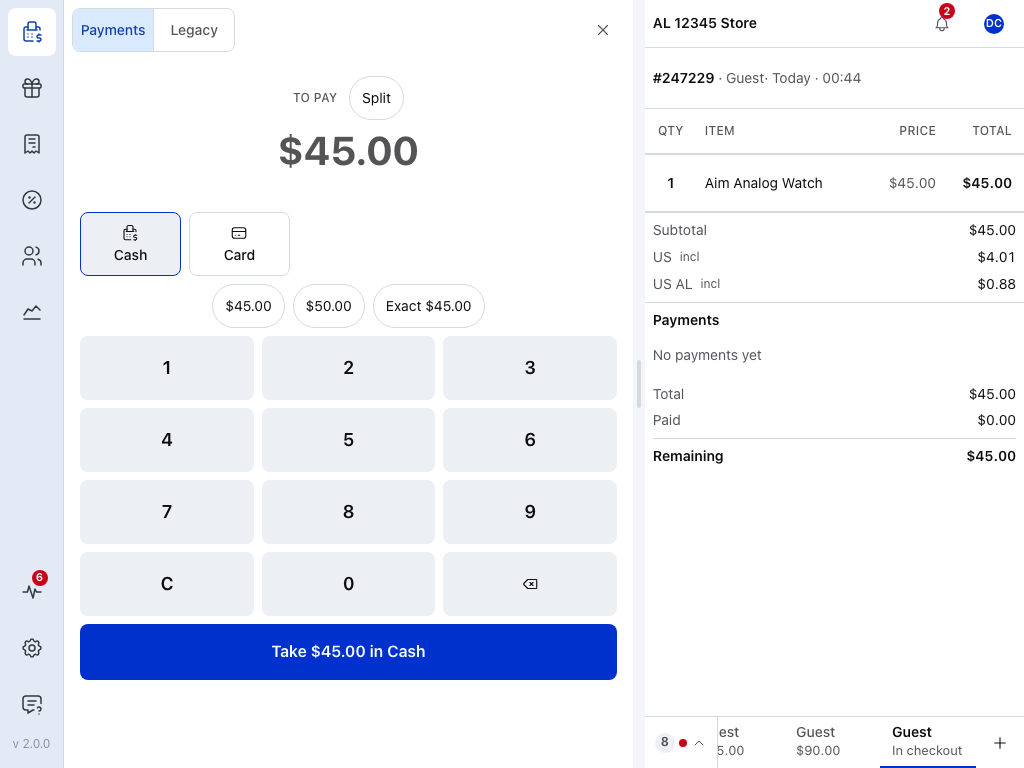
- Payments tab — the payment method tiles and what's been taken so far. See The Tender Pane.
- Legacy tab — your store's own payment page inside the POS. With the free plugin it offers Card; WCPOS Pro adds your store's other payment methods. Cash isn't on it. Once a payment has been taken, Whole bill only shows under the tabs. See The Legacy Tab and If the order is partly paid.
- To pay — the balance still due. After a part payment it names the next payment and what's left.
- Split — divides the bill into several payments. See Split the bill.
- Payment method tiles — the ways your store takes payment at the till, set in Checkout Settings. See Payment Methods.
- Quick amounts — the exact amount, or the next round notes up.
- Keypad — enter what the customer hands over. C clears it.
- Take — names the amount and the method. Press it to record the payment. See Taking a Payment.
On a phone the same controls stack under the title, with ✕ at the top right.
A card on your own terminal works the same way: take the card first, then record it. A paired reader takes the amount from the till; see On a Card Reader.
Give change
Type or tap more than is due and the change becomes the big figure, with what you were handed under it. Count the change out before you press Take.
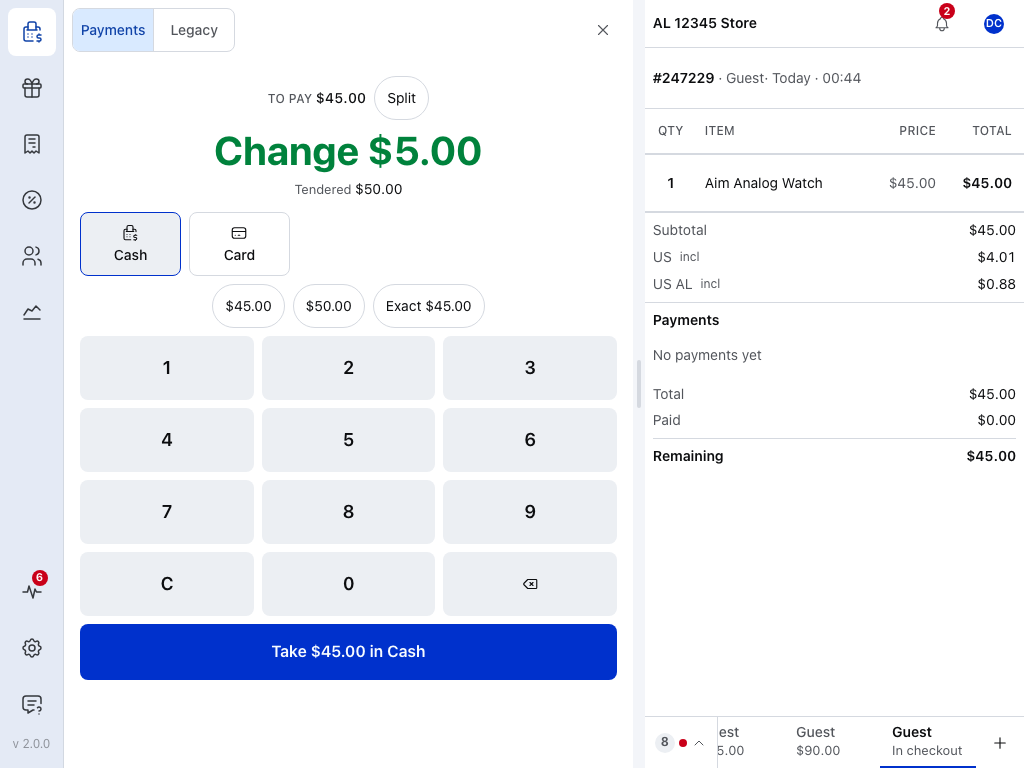
- ✕ — back to the cart, with the order still on it. Once a payment has been taken, it opens Cancel payment instead; see Cancelling a Payment.
- To pay — what the sale costs.
- Change — what to give back.
- Tendered — what you typed or tapped.
- Cash — the method this payment goes on.
- Take — records the payment and finishes the sale.
Split the bill
Press Split to take the bill in several payments. A strip opens with Percent and an even split from 2 ways to 6 ways, each showing what one part comes to; scroll it sideways for more. You can also pick the items each person pays for. Press Split again to go back to one payment. See Split Payments.
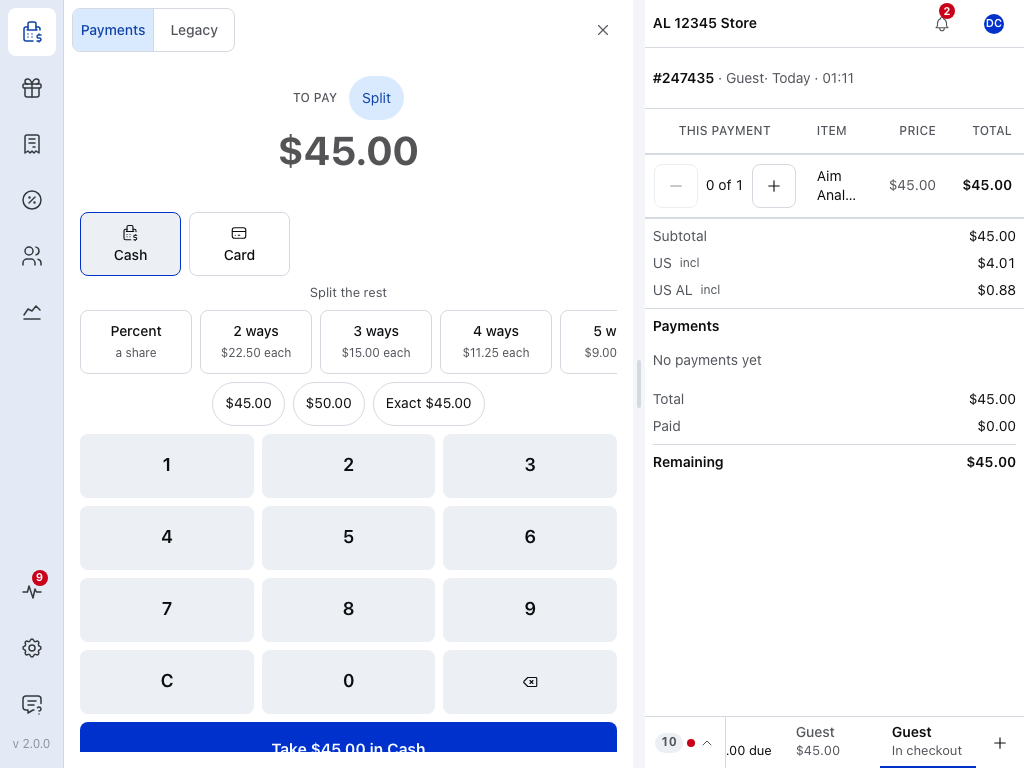
- Split — on while a split is planned. Press it again to turn it off; payments already taken stay.
- Split the rest — tap 2 ways to 6 ways to share what's left evenly, or Percent to take a share.
- This payment — − and + pick how many of each item this payment covers.
See it paid
When nothing is left to pay, the sale is done and the receipt is ready.
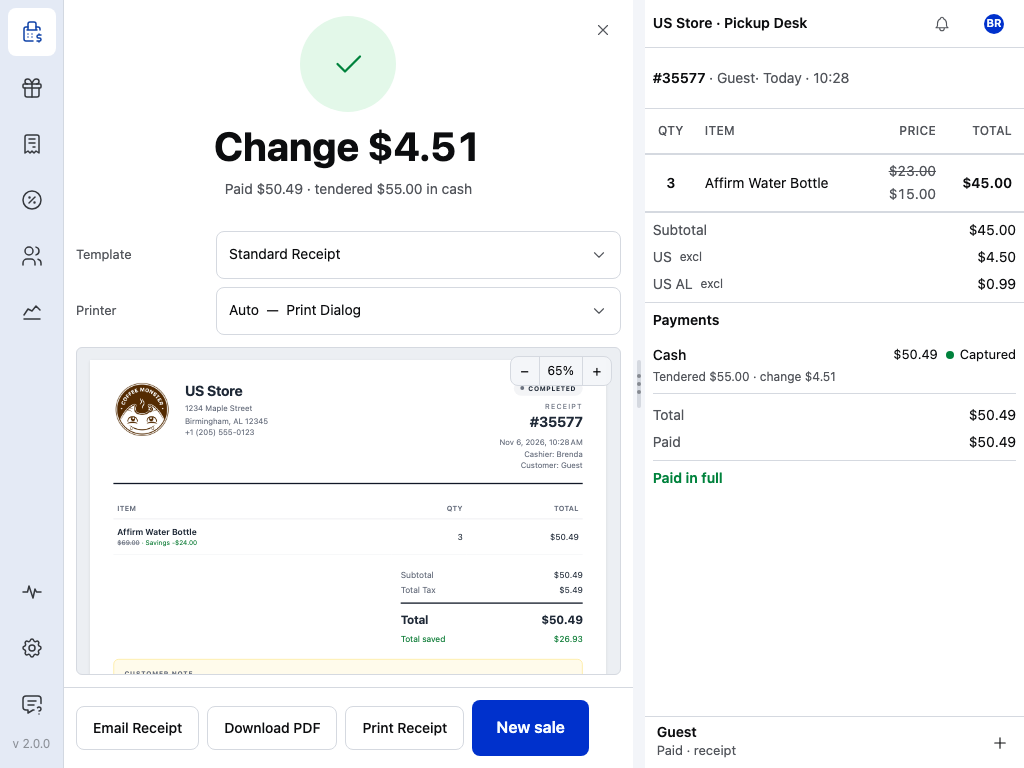
- Change — what to give back.
- Paid with — the amount and the method.
- Template — which receipt this sale gets. A pick here lasts for this sale. See Customising Receipts.
- Printer — where it prints. See Print Receipt.
- Preview — the receipt as it will print.
- Print Receipt — prints it.
- Email Receipt — sends it to the customer. See Email Receipt.
- New sale — an empty cart for the next customer, back on your default customer.
Download PDF saves the receipt as a file. It needs a connection. ✕ at the top finishes the sale too, like New sale.
If your till skips the paid screen and prints by itself, the receipt still prints after each sale. See Print or skip the paid screen automatically.
If something goes wrong
Wrong item in the cart. Tap the line's total, then Remove. The message that appears has an Undo button if that was a mistake too. See Line Items.
The customer changes their mind. At checkout, ✕ takes you back to the cart with the order still on it. To drop the sale, press ⋮ beside Checkout, then Void. See Void. If a payment has already been taken, ✕ opens Cancel payment first; see Cancelling a Payment.
Not enough cash. Type what they gave you. The button reads, for example, Take $20.00 in Cash · $25.00 left. Press it: the payment is recorded and the rest stays due; take it on any tile. See Take part of the balance.
The connection drops. Cash still completes on a sale your store already knows, one with its order number above the items in Checkout; a sale started while offline can't be paid until the connection returns. The receipt keeps the real time and register, and the order syncs when the connection returns. If none of your payment methods can take a payment offline, checkout says No connection and that the sale is saved in your open orders; press Back to the register. See Offline Mode.
A paired customer display shows the cart to the customer as you ring it up.
Related Documentation
Each part of checkout has its own page: