POS Settings
POS settings: Settings in the POS changes this device only.
Settings is where you set up how the POS works on this device: the language and the way money is written, how tax shows, the printers, card readers and scanners at this till, a customer display, and how the POS looks. There's no Save button: a change takes effect as soon as you make it.
What you change here is kept on this device, the Tax rows included: a reload or a sync with your store keeps it. Another till keeps its own settings, so set each till up on that till.
Who can use the POS, the payment methods at checkout and your registers aren't set here: they're set in WordPress. See Settings in WP Admin.
Open Settings
On a phone, tap the menu (☰) at the top left, then Settings. See On a phone.
On a wider screen, click Settings near the foot of the side menu, between Store health and Support. Settings opens on General, with its seven pages listed beside it. Click a page to open it. When you're done, click POS at the top of the side menu to go back to the till.
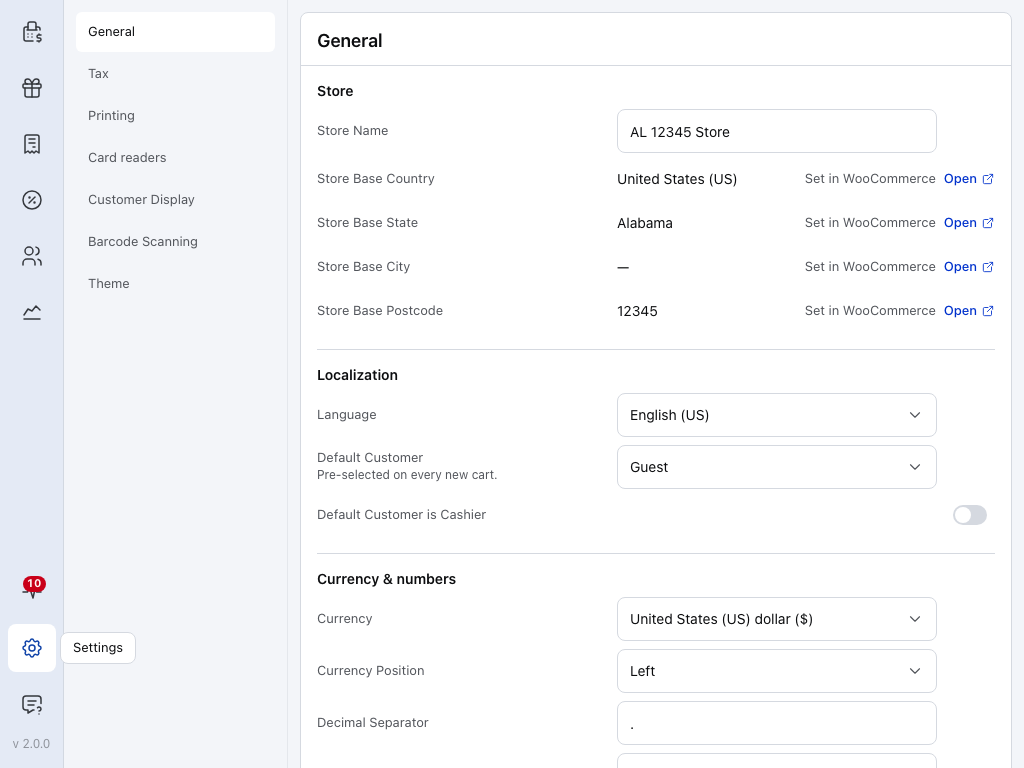
- Settings — in the side menu, under Store health (the pulse with the red count) and above Support.
- General — the store's name, the language, the default customer on a new cart, and how money is written: currency, decimals and separators. Restore Server Settings is at its foot. See General.
- Tax — what tax is worked out from, and whether prices show with or without it. See Tax.
- Printing — the receipt printers this device prints to, and which printer each receipt template uses. See Printers.
- Card readers — the card readers this till takes payments with: connect, disconnect or forget one. Card readers come with WCPOS Pro. See Card Readers.
- Customer Display — pair a second screen that faces the customer. Customer displays come with WCPOS Pro. See Pair a customer display.
- Barcode Scanning — set up and test this till's barcode scanner. If a scan isn't picked up, or typing is taken for a scan, see Barcode Settings.
- Theme — the colours, the size of buttons and text, the icons and the fonts. See Theme.
Restore Server Settings replaces the General and Tax values you changed on this device with your store's values, all but Thousands Group Style. Printers, scanners and the theme stay as they are. See Restore Server Settings.
A row that reads Set in WooCommerce shows a value your store sends, such as its address or Enable Taxes. You can't change it here: press Open beside it to change it in WooCommerce.
Pair a customer display
- In Settings, open Customer Display.
- Press Generate pairing code.
- On the screen that faces the customer, open the Display page URL, then enter the code there.
On a phone
- Tap the menu (☰) at the top left, then Settings near the foot of the menu.
- Settings opens on a list of its seven pages, the same as above. Tap one to open it.
- Tap ‹ Settings at the top to go back to the list.
- To go back to the till, tap the menu (☰) on the list, then POS.
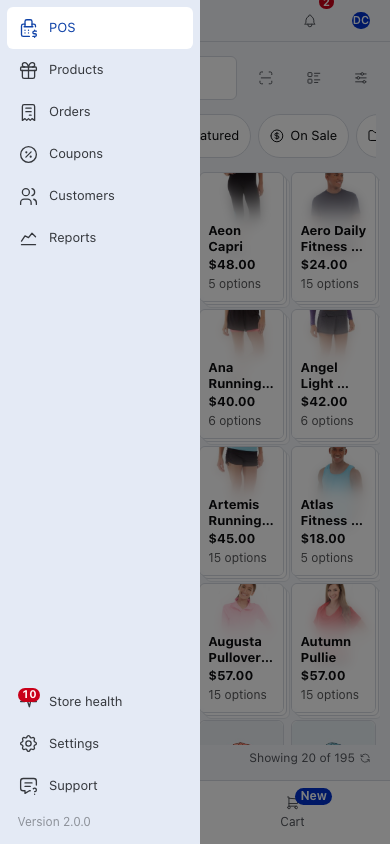
- POS — back to the till.
- Store health — the store's connection and the app's logs. See Store Health.
- Settings — opens the list of settings pages.
- Support — help and a way to contact us. See Support.
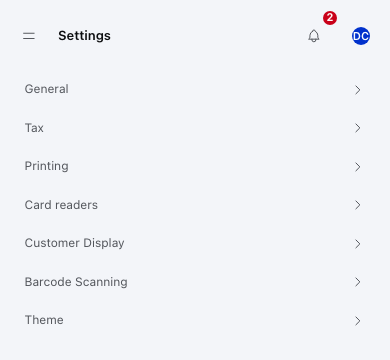
- General — see General.
- Tax — see Tax.
- Printing — see Printers.
- Card readers — see Payment Gateways.
- Customer Display — pair a second screen that faces the customer (WCPOS Pro).
- Barcode Scanning — see Barcode Settings.
- Theme — see Theme.
Keyboard shortcuts
There's no settings page for keyboard shortcuts, and they can't be changed. On the POS screen, press Alt + / to see them all. See Keyboard Shortcuts.
Settings in WP Admin
Who can use the POS, the payment gateways at checkout, registers and their floats, the emails sent for POS orders, and your store's tax IDs are set in WordPress, under WP Admin > POS > Settings, not in the app. See WordPress Admin Settings.
If something goes wrong
Another till looks or works differently. Each device keeps its own settings. Open Settings on that till and set it there too.
A value doesn't match WooCommerce. Restoring replaces the General and Tax values you changed on this device with your store's values, all but Thousands Group Style. Printers, scanners and the theme stay as they are. Press Restore Server Settings at the foot of General. See Restore Server Settings.
No card readers are set up for this store. Card readers are set up on the payment gateway's page in WooCommerce first, and they need WCPOS Pro. See Payment Gateways.
Customer displays are a Pro feature. Your store runs the free plugin. See WCPOS Pro. If it says Customer displays need a newer version of WCPOS Pro, update the Pro plugin in WordPress.