Card Readers
Settings → Card readers is where a till picks the card reader it takes payments with. Each till keeps its own reader: what you connect here is not shared with your other tills.
Card readers need WCPOS Pro.
Before a till can use a reader, a shop manager or administrator sets up card payments for your store in WooCommerce, including which kinds of reader tills may use. If that hasn't been done, ask them; the steps are in Payment Gateways.
Open Card readers
Tap Settings at the bottom of the POS side menu, then Card readers. The page lists the readers this till can use in up to three sections:
- Smart readers — card terminals on your shop's network. Every till can use them: browser, desktop app, iPhone, iPad and Android.
- This phone — Tap to Pay: the phone itself takes the card. Coming to the iOS and Android apps in an app update.
- Bluetooth readers — a reader paired with this phone or tablet, such as a Stripe Reader M2, WisePad 3 or SumUp Solo Lite. iOS and Android apps only.
Why a reader option is missing
- Bluetooth and Tap to Pay rows show only when the store lets tills use the app's readers. A Stripe store with both kinds ticked, the default, gives every till smart readers only: see Stripe connections.
- A browser or the desktop app can't reach a Bluetooth reader or a phone's contactless chip, so those tills list Smart readers only. A store that allows only the app's readers leaves them none: see Only the app's readers are allowed.
While your store has no reader this till can use, the page shows this message instead of the sections:
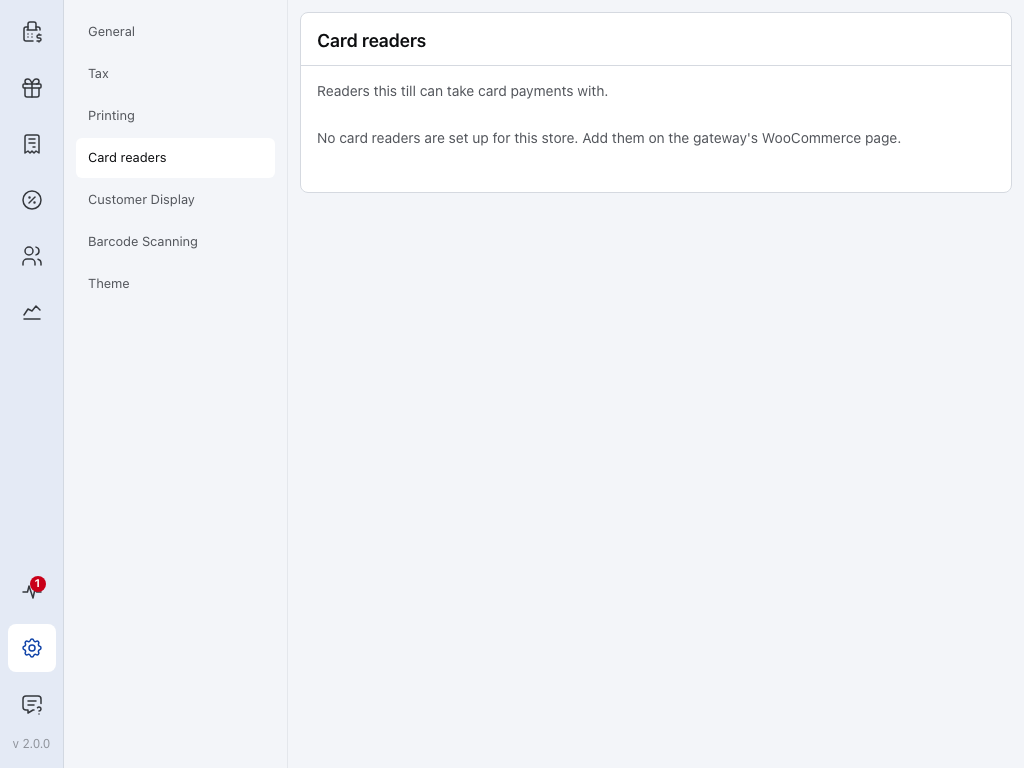
- Card readers — the fourth page of Settings, after General, Tax and Printing.
- No card readers are set up for this store. Add them on the gateway's WooCommerce page. — what the page says while your store has no reader this till can use. Once a reader is set up, the sections above take its place.
Choose a smart reader
Under Smart readers, check the reader's name and location, then tap Use this reader on one marked Online. Its row changes to Selected: this till now sends its card payments to that reader. Do it once on each till, so each counter pays with its own reader.
If a row reads Set by the store, the store has locked tills to its default reader: no row offers Use this reader, and every till pays with that one.
Each row shows the reader's name, its location, whether it's Online or Offline, and the payment method's name as a small label.
Why a reader is already Selected
You may find a row already Selected before you choose:
- The store's default reader is Selected while it's Online, on a till that hasn't chosen a reader yet or whose own reader is offline.
- A store with one reader needs no choice: while that reader is Online, it is Selected on every till.
Your reader isn't in the list
A smart reader sits on your shop's network, and your store sends it the payment. It shows here, on every till and with no pairing, once it's registered with your payment provider and allowed on the gateway's page. If it isn't, ask a shop manager or administrator: see Payment Gateways.
At checkout the till reads Terminal: and the reader's name, with Change to pick another when the store allows it.
Connect a Bluetooth reader
Stripe and SumUp connect their Bluetooth readers differently: a Stripe reader is connected on this page, below; a SumUp reader is chosen in SumUp's own screens, see SumUp readers.
Stripe readers
These steps are for Stripe Bluetooth readers, such as the Stripe Reader M2 or WisePad 3.
- Stripe needs a Terminal location. If the row reads Could not connect: This gateway has no Terminal location, ask a shop manager or administrator to finish Stripe Terminal setup.
- Charge the reader. Its first connection installs a software update that takes about 10 minutes.
In the iOS or Android app:
- Switch the reader on and keep it near the phone or tablet.
- Tap Connect a reader in Settings → Card readers. If the till asks Connect a reader with, pick the Stripe payment method.
- Tap Connect beside your reader. The row lists each reader it finds with its model and serial number; match the serial number to yours.
- Wait while it connects. The row reads Connecting to and the reader's name. The first time, it then reads Installing reader software with a progress bar: stay on the screen until it finishes.
- Check the row reads Connected with the reader's battery, for example Connected · 82%.
Later connections take a few seconds. You don't need to come back here before each sale: when you pick that payment method at checkout, the till reconnects to the same reader on its own.
While no reader is connected, the Bluetooth readers section reads No reader connected yet. Turn the reader on and keep it near this phone.
Everything a reader row can say
Each row shows the reader's model (WisePad 3, Stripe Reader M2), its serial number, the payment method's name as a small label, the Terminal location, and one line of state:
- Looking for readers…, then 1 reader found. Is this yours? or 3 readers found. Which one is yours? — the search. Tap Connect beside yours.
- Connected · 82% — ready, with the battery left. Tap to Pay reads Ready.
- Not connected — the till remembers this reader but isn't connected now. Tap Connect.
- Connecting to … — wait. The button reads Connecting….
- Installing reader software — the update, with a progress bar. The button reads Installing….
- Saved in the SumUp app — a SumUp reader chosen in SumUp's screen.
- No readers found. Turn the reader on and try again. — see If something goes wrong.
- Could not connect:, Could not disconnect: or Could not forget the reader: — the provider's reason follows. Try again and Help sit below.
- Turn on Bluetooth to connect a reader., Allow access to the reader in app settings., Sign in to SumUp to use its reader. — see If something goes wrong.
SumUp readers
SumUp pairs its readers in its own screens. Tap Connect a reader, and pick SumUp if the till asks: SumUp's screen opens, signs you in if needed, and lets you choose the reader. Afterwards the SumUp row has one button, Open SumUp reader settings (named after the payment method), to go back to that screen.
- Until you sign in, the row reads Sign in to SumUp to use its reader.
- Once a reader is saved there, the row reads Saved in the SumUp app, and Connected while the reader is in use.
Which SumUp readers work: see SumUp Terminal.
Set up Tap to Pay
With Tap to Pay the phone is the reader: the customer taps their card, phone or watch on it. It is coming to the iOS and Android apps, with Stripe Terminal, in an app update. The steps below are for when your app has it.
- In Settings → Card readers, the This phone section has a Tap to Pay on iPhone or Tap to Pay on Android row, reading Not set up.
- Tap Set up Tap to Pay. Only a shop manager or administrator sees the button; anyone else sees Not set up · ask an administrator.
- The first time, accept the provider's terms. On an iPhone, Apple asks you to link an Apple ID and accept its Tap to Pay terms.
- The row becomes This device and reads Ready.
Tap to Pay needs a connection to take a payment.
Disconnect, forget or release a reader
These are for Stripe Bluetooth readers and Tap to Pay. Each of those rows has a button and a ⋮ menu. A SumUp row has only Forget under its ⋮; everything else about a SumUp reader is done in SumUp's screen, from SumUp readers.
- Disconnect — the button on a connected row. The till lets go of the reader for now but remembers it, and reconnects at the next card sale. Use it to lend the reader to another till for a while.
- Forget — under ⋮. The till asks Forget WisePad 3? It will not reconnect at the next sale. You can connect it again from this page. Tap Forget to drop the reader from this till.
- Release the reader — if a row is stuck on Connecting to …, open ⋮, tap Release the reader, then tap Connect again. The item shows only while the till is still holding a reader it isn't connected to.
What each message on a row means: see Everything a reader row can say.
At checkout
When you pick a Bluetooth reader's payment method, checkout shows one line about the reader:
- WisePad 3 · Connected · 82% — ready to send the amount.
- Connecting… or Updating reader software — the till is reconnecting to the reader it remembers. Wait.
- No reader connected or Could not reconnect to the reader — tap Connect in Settings → Card readers, which brings you to this page. Connect the reader, then go back to the sale.
Taking the payment itself: see On a Card Reader.
Once you've sent the amount, the reader tells the till when the customer has paid, and the till takes the payment without you pressing anything: see You don't have to watch the terminal.
If something goes wrong
Open the entry that matches what the reader row says or what you see.
No readers found. Turn the reader on and try again.
Switch the reader on, charge it, and hold it close to the device. Then tap Try again. Can't see your reader? under the line opens this page.
Turn on Bluetooth to connect a reader.
Bluetooth is off on this device. Turn it on in the device's settings.
Allow access to the reader in app settings.
The app was refused permission to use the reader. Open the device's Settings app, find WCPOS and allow Bluetooth. On Android, also allow Location: Android needs it to scan for Bluetooth readers.
Sign in to SumUp to use its reader.
Tap Open SumUp reader settings and sign in.
Could not connect: This gateway has no Terminal location.
Choose a Terminal location on the Stripe gateway's page. See Stripe Terminal setup.
Could not connect: with another reason
Tap Try again. If it keeps failing, tap Help, which opens this page, and check the reason with your payment provider.
The update is still installing.
The first update takes about 10 minutes. Keep the reader on and charged, and stay on the screen.
A reader row is stuck on Connecting to ….
Tap ⋮ on its row, then Release the reader, and connect again.
No card readers are set up for this store.
No gateway on your store has a reader this till can use. An administrator sets one up on the gateway's page. See Payment Gateways.
Only the app's readers are allowed for this store.
A browser or desktop till reads Only the app's readers are allowed for this store. Allow smart readers on the gateway's WooCommerce page to pay from this till. The store allows Bluetooth readers and Tap to Pay only, which a browser or desktop till can't use. Use the iOS or Android app, or allow smart readers on the gateway's page. For Stripe, see Smart readers, Bluetooth or both.