SumUp Terminal Gateway
SumUp Terminal puts a SumUp card reader at your till. The till sends the amount to the reader, the customer pays on it, and the sale completes when SumUp approves the payment. This page sets the gateway up once, pairs or connects the reader, and takes the first payment.
Already set up? Pair a Solo, connect a Bluetooth reader or take a payment.
SumUp Terminal 2.0 needs WCPOS Pro 2.0.0 or newer. Without it the extension does nothing at the till.
Solo over the cloud or Bluetooth
The gateway's POS connection setting chooses how the POS reaches the reader. It is one choice for the whole store.
- Solo over the cloud (the default): your store connects to a SumUp Solo over the internet. It works from every till: browser, desktop app, iPhone, iPad and Android. You pair the Solo once, on the gateway's page.
- Bluetooth reader: the WCPOS iOS or Android app connects to a Solo Lite, Solo or Air over Bluetooth. Each till connects its own reader, in the app. This option is listed only when the store's WCPOS Pro supports readers the app connects to.
A browser or the desktop app can't reach a Bluetooth reader. With Bluetooth reader chosen, the SumUp tile on those tills is listed under … not available right now, so use Solo over the cloud if any till runs in a browser or the desktop app. The tile's message is explained under Only the app's readers are allowed.
Set up the gateway
An administrator does this once per store, in WP Admin.
-
Install the extension. In
WP Admin > POS > Settings > Extensions, find SumUp Terminal for WooCommerce, click Install, then Activate, and check it is version 2.0.0 or newer: the directory can still list an older version. See Extensions.Install from a downloaded zip instead
Download
sumup-terminal-for-woocommerce.zipfrom the release assets on GitHub and upload it withPlugins > Add Plugin, then Upload Plugin. The GitHub "Source code" zip won't install. -
Add your API key. Your SumUp API Key is in the SumUp Developer Portal, under the account that owns your readers. Go to
WP Admin > WooCommerce > Settings > Payments, open SumUp Terminal, and paste it into SumUp API Key. -
Choose the POS connection: Solo over the cloud or Bluetooth reader. For Bluetooth reader, also enter the Affiliate Key from SumUp Affiliate Keys.
-
Save the settings.
-
Turn it on for the POS. Go to
WP Admin > POS > Settings > Checkout, switch on SumUp Terminal and save. You don't need to enable it in WooCommerce's own payment list; see Checkout Settings. -
Pair or connect the reader: a Solo over the cloud is paired on this page; a Bluetooth reader is connected in the app.
SumUp Terminal is for the POS only. It isn't offered on your shop's online checkout.
Every setting on the gateway's page
| Setting | What it does |
|---|---|
| Title and Description | The name and line shown for the gateway. The till shows the title on the tile. |
| SumUp API Key | From your SumUp account. |
| Affiliate App ID and Affiliate Key | From SumUp Affiliate Keys. The key is needed for Bluetooth reader: the app starts SumUp's reader software with it. It is optional for Solo over the cloud. |
| POS connection | Solo over the cloud (the store drives the reader) or Bluetooth reader (the POS app drives the reader: Solo Lite, Solo, Air). |
| Offline card payments | Has no effect in 2.0; see Offline payments. |
| Default terminal | The paired Solo a till pays with until it picks another. |
| Enabled terminals | Limits tills to the Solos you select. Leave it empty to allow all of them. |
| Lock terminal selection | Cashiers cannot change the terminal at checkout. Needs a Default terminal. |
| Checkout debug logs | Shows detailed SumUp payment logs at the checkout. Payment activity is always logged under WooCommerce > Status > Logs. |
Below the fields, the page shows the connection status, your SumUp merchant details and the paired readers. There is no webhook to set up: the store tells SumUp where to send each result.
Pair a Solo over the cloud
The pairing code comes from the Solo itself, not from the SumUp app, and you type it into the gateway's page in WP Admin.
- Turn on the Solo. Don't log in to SumUp on it.
- On the Solo, open the menu, then Connections → Cloud API. It is the last item in the list. Tap Connect: the Solo shows a pairing code.
- In WP Admin, open the gateway's page (
WooCommerce > Settings > Payments > SumUp Terminal). Under Pair a New Reader, type the code into Enter pairing code and press Pair Reader. - The page reads Reader paired successfully! and reloads. Your Solo is listed under Readers Configured, with its model and serial number.
No Cloud API on the Solo? Log out of your SumUp account on the reader, then open the menu again.
To pair a second Solo, use Pair Additional Reader. Unpair Reader beside a reader removes it from the store.
Connect a Bluetooth reader in the app
With POS connection set to Bluetooth reader, each phone or tablet connects its own reader in the WCPOS iOS or Android app. Tap Settings at the bottom of the side menu, then Card readers: once the gateway is set up, the page has a Bluetooth readers section with a Connect a reader button. If it reads only No card readers are set up for this store, see No card readers.
- Switch the reader on and keep it near the phone or tablet.
- Tap Connect a reader. If Connect a reader with appears, choose SumUp Terminal.
- SumUp's own screen opens: sign in to your SumUp account and choose the reader.
Once a reader is saved, Card readers shows a SumUp Terminal row. Next time, use its Open SumUp Terminal reader settings button. The button carries the gateway's Title, so it reads differently if you renamed it.
Back on Card readers, the row reads Connected, or Saved in the SumUp Terminal app while the reader is remembered but not connected. Sign in to SumUp Terminal to use its reader. means the app isn't signed in to SumUp yet: tap the button again.
Test before you go live
For Solo over the cloud, you can run a sale without a reader or real money: SumUp's Virtual Solo simulates a Solo for a SumUp sandbox account.
Test with a Virtual Solo
- On the gateway's page, paste the sandbox account's API key into SumUp API Key and save.
- Pair the Virtual Solo with its pairing code, the same way as a Solo. It is listed under Readers Configured.
- Run a sale with the steps in Take a payment. The tile reads Terminal: … with the Virtual Solo.
When you're done, put your live API key back, save, and pair your real Solo before you take a real payment.
Take a payment
With Open and close the register switched on, the till won't record a payment while the register is closed, and a card you've already taken would have to be refunded. See Open the Register.
-
Build the cart and press Checkout.
-
Tap the SumUp Terminal tile among the ways to pay and check the reader line:
- Solo over the cloud: Terminal: …, with Change to pick another Solo when the store allows it.
- Bluetooth reader: Connected with the reader's battery. No reader connected means it isn't connected: tap Connect in Settings → Card readers.
-
Press Send … to SumUp Terminal and let the customer pay on the reader:
- Solo over the cloud: the till reads Waiting for the customer on the terminal. To stop, press Cancel on terminal.
- Bluetooth reader: the till reads Present card on the reader. To stop, cancel on the reader itself. If you press Cancel on terminal on the till, it reads Cancel on the reader. The reader can ask the customer for a tip; see Tips.
The till ticks off Sent, On terminal, Approved and Captured.
-
With nothing left to pay, the receipt screen opens: print or email the receipt, then press New sale. See See it paid. If part of the total is left, take the rest another way; see Split Payments.
A declined or cancelled card shows Payment failed: … with Try again and Choose another way. See On a Card Reader.
On the checkout's Legacy tab, SumUp Terminal shows a Terminal picker with Send to terminal, Cancel and Try again, recorded like a payment from the tender pane.
An older SumUp Terminal, before 2.0
Versions before 2.0 have no tile on the tender pane. The gateway is on the Legacy tab, on its own payment page with Start New Payment, Cancel Payment and Payment Status, and works with a Solo over the cloud only. Update to 2.0 for the tile and for Bluetooth readers.
Offline payments
WCPOS 2.0 doesn't take SumUp card payments while the till is offline, on any reader, whatever the gateway's Offline card payments setting says. With no connection, the SumUp tile is listed under … not available right now with Needs a connection. Take the sale in cash, or wait for the connection to come back; see Offline Mode.
Offline card payments are on the roadmap.
If something goes wrong
- The Solo won't pair
- "Only the app's readers are allowed for this payment method."
- The SumUp tile isn't available offline
- "No card readers are set up for this store"
- "No terminals set up for SumUp Terminal"
- The payment won't start
- "A store administrator must enter a SumUp Affiliate Key…"
- The card is declined
The Solo won't pair. Use a SumUp Solo: it is the only reader that pairs over the cloud, and a Bluetooth reader connects from the WCPOS app instead. Check the Solo is online, logged out of SumUp, and showing the code from Connections → Cloud API. Type the code exactly as shown.
"Only the app's readers are allowed for this payment method." The till is a browser or the desktop app, and POS connection is Bluetooth reader. Take the payment on the iOS or Android app, or have an administrator set POS connection to Solo over the cloud and pair a Solo. The line's Having trouble? link opens the Card Readers page.
The SumUp tile isn't available offline. Card readers wait for the connection; see Offline payments.
"No card readers are set up for this store". The gateway isn't set up yet, so Card readers shows only this message:
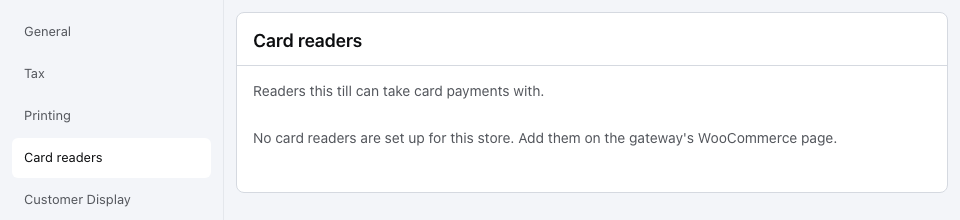
- No card readers are set up for this store — finish Set up the gateway, then connect the reader.
With Solo over the cloud, your paired Solos are listed under Smart readers on Card readers, not as a SumUp row.
"No terminals set up for SumUp Terminal". No Solo is paired, or Enabled terminals leaves none for this till. See Pair a Solo over the cloud.
The payment won't start. Open the gateway's page in WP Admin. It should read Connected to SumUp. Connection Failed means the SumUp API Key is wrong or no longer active. Check the Solo is on, charged and online, and listed under Readers Configured.
"A store administrator must enter a SumUp Affiliate Key…". The gateway has no Affiliate Key, which a Bluetooth reader needs. See Set up the gateway, step 3.
The card is declined. Ask for another card or another way to pay.
Still stuck? Tick Checkout debug logs and read the payment activity under WooCommerce > Status > Logs, report a bug on GitHub, or contact SumUp support about your account or reader.