Product Panel
The Product Panel is the left side of the POS screen where you search, browse, and select products to add to the cart.
Interface Overview
Search Bar
At the top of the panel, the search bar lets you quickly find products by:
- Product name - Type any part of the product name
- SKU - Search by Stock Keeping Unit
- Barcode - Scan or type a barcode number
See Search & Filtering for detailed information.
Display Settings
Click the sliders icon () next to the search bar to open Display Settings. This allows you to customise which columns and information are shown in the product list.
Filter Buttons
Below the search bar, filter buttons let you narrow down products:
- In Stock - Show only products with available inventory
- Featured - Show products marked as featured in WooCommerce
- On Sale - Show products currently on sale
- Category - Filter by product category
- Tag - Filter by product tag
- Brand - Filter by brand (if using a brand plugin)
Active filters appear highlighted. Click a filter again to remove it.
Product List
The main area displays your products in a scrollable list. Each row shows:
- Product image - Thumbnail of the product
- Product name - With optional details (stock, SKU, categories, etc.)
- Price - Current selling price (with sale prices shown when applicable)
- Action button - Add to cart () or select variation ()
Product Types
- Simple products show a green button to add directly to cart
- Variable products show a green arrow to open the variation selector
See Variable Products for more details.
Footer
At the bottom of the Product Panel:
- Tax status - Shows the current tax calculation basis (e.g., "Tax based on: Shop base address"). Click to view active tax rates.
- Product count - Shows how many products are displayed (e.g., "Showing 10 of 17")
- Sync button () - Refresh products from the server. Long press for additional options:
- Sync - Standard refresh from server
- Clear and Refresh - Clear local data and reload everything
Display Settings
Click the sliders icon () to customise the Product Panel display.
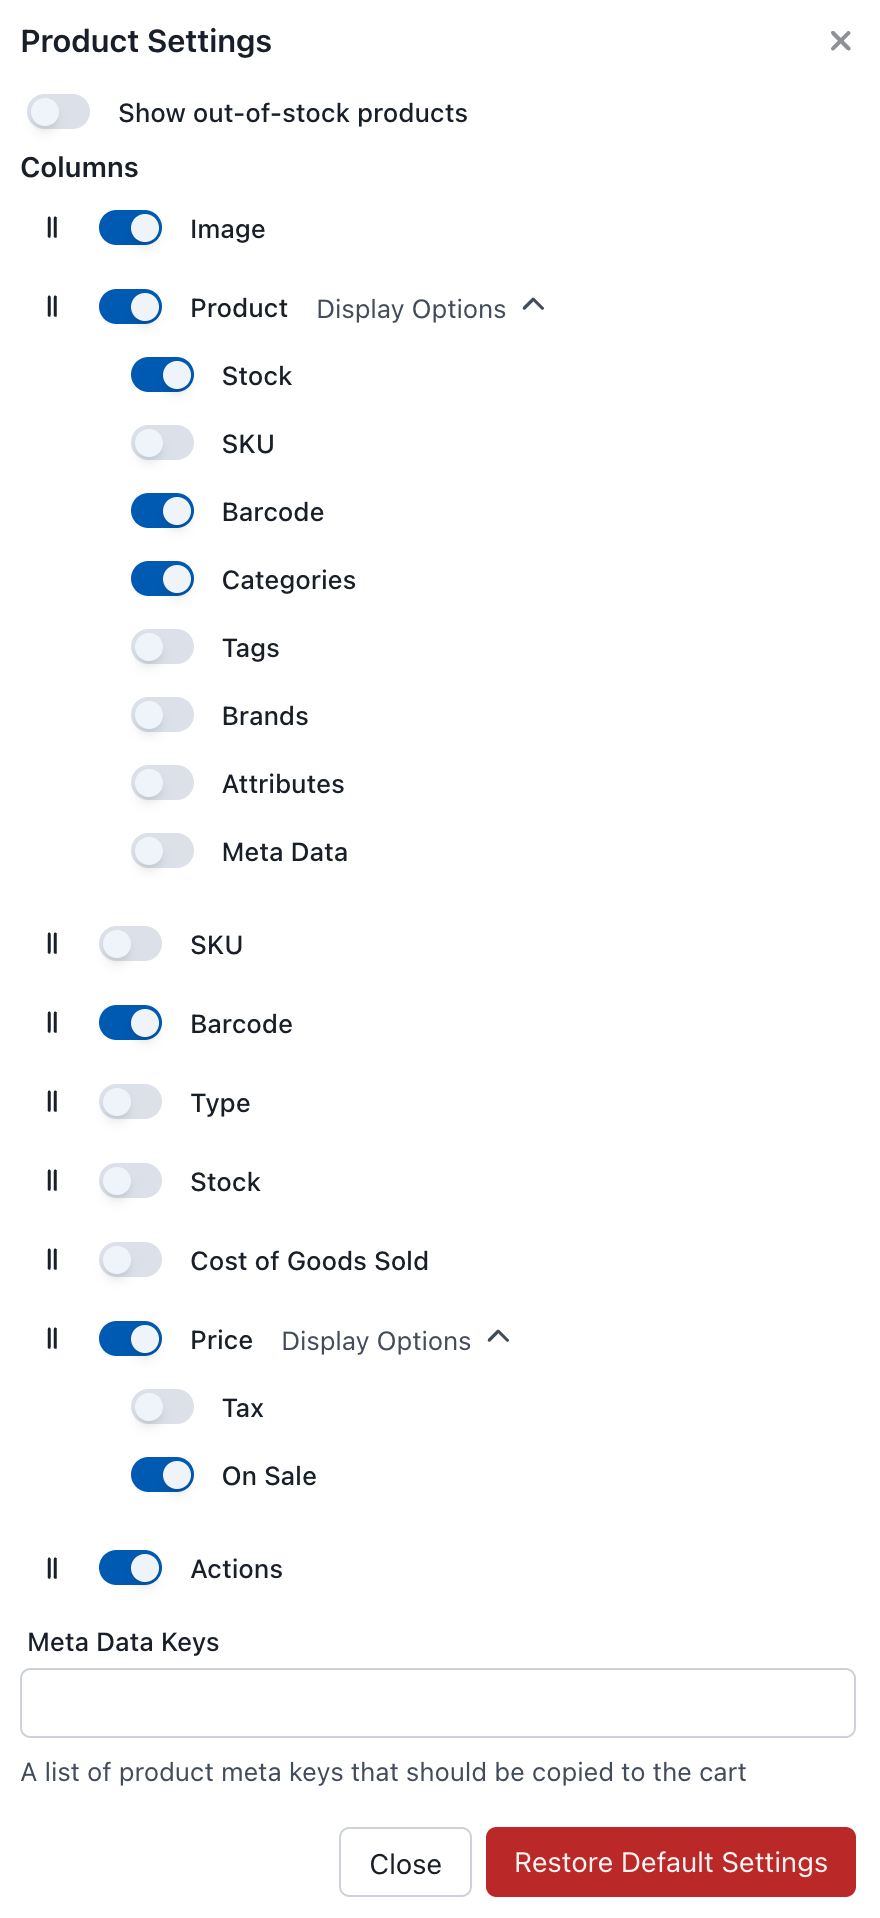
Product Panel Display Settings
Show Out-of-Stock Products
Controls whether products that are currently out of stock are displayed.
- Enabled: Out-of-stock products remain visible but can't be added to cart
- Disabled: Out-of-stock products are hidden from the list
Columns
Configure which columns appear in the product list:
| Column | Description |
|---|---|
| Image | Product thumbnail |
| Product | Product name and details |
| SKU | Stock Keeping Unit (separate column) |
| Barcode | Product barcode (separate column) |
| Type | Product type (simple, variable, etc.) |
| Stock | Current stock quantity |
| Cost of Goods Sold | Product cost price |
| Price | Selling price |
| Actions | Add to cart button |
Two columns have extra display options you can toggle on:
| Column | Display options |
|---|---|
| Product | Stock, SKU, Barcode, Categories, Tags, Brands, Attributes, Meta Data |
| Price | Tax info, On Sale indicator |
Meta Data Keys
A meta data key is a custom field stored on a product in WooCommerce. By default these stay on the product — they aren't copied onto the order. This setting lets you carry specific keys over to the cart line item when the product is added.
Example: a bottle-deposit plugin stores a _bottle_deposit value on each product. Add that key here, and whenever the product is added to the cart its deposit value travels with the line item onto the order — so it shows up on the order, the receipt, and any downstream reports.
Enter a comma-separated list of meta keys:
_bottle_deposit,_custom_field,_tracking_code
Meta keys are case-sensitive and must match exactly as stored in the product's meta data.
When would I use this?
Common cases for transferring product meta data to order line items:
- Bottle deposit plugins — carry the deposit amount onto the order.
- Custom product fields — pass your own product data through to the order.
- Third-party integration data — hand values off to other plugins that read order line items.
- Compliance / tracking information — keep batch, lot, or tracking codes attached to what was sold.
Restore Default Settings
Click to reset all display settings to their original defaults.
Adding Products to Cart
Simple Products
Click the green button to add a simple product to the cart. Each click adds one more unit.
Variable Products
Variable products (e.g., a t-shirt with size and colour options) show a green arrow. Click to:
- Quick popover - Select variation from a dropdown
- Expand inline - Click "Expand" to see all variations in the list
See Variable Products for more details.
Barcode Scanning
Connect a USB or Bluetooth barcode scanner to quickly add products. When you scan a barcode, WCPOS automatically searches for and adds the matching product.
See Barcode Scanning for setup instructions.
Why Can't I See Some Products?
If products are missing from your Product Panel, check:
- POS visibility - Products set to "Online Only" won't appear in the POS. See POS Only Products.
- Stock settings - If "Show Out-of-Stock Products" is disabled in Display Settings, out-of-stock items are hidden.
- Sync status - New or recently updated products may need a sync. Long press the sync button and select "Clear and Refresh".
- Filters - Check if you have active filters (Category, Tag, etc.) that might be hiding products.